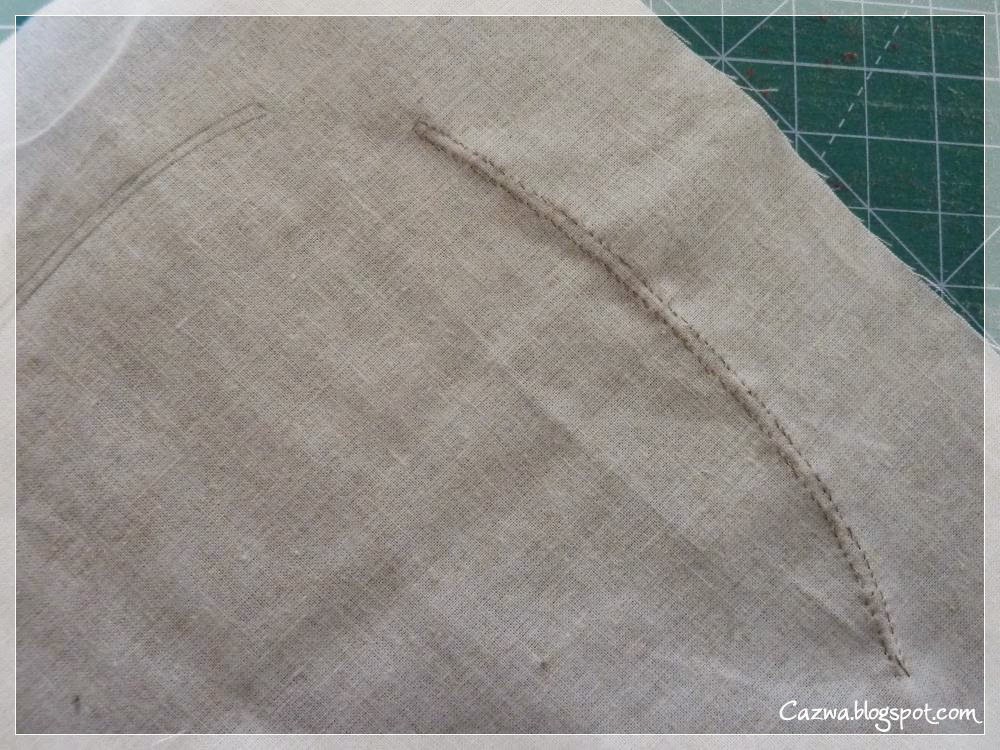
Ik kreeg veel vragen over hoe ik nu die smalle bloemsteeltjes maak en zoals beloofd is hier een beschrijving ervan:
Leg je tekening met de goede kant naar beneden op de lichtbak (als je tekening in spiegelbeeld is, dan hoeft dit niet) en leg je stof erop. Teken nu met een fijne potlood de lijnen van je bloemsteeltjes op het stof.
I got a lot of questions about how I made those small stems and as promised is here my tutorial:
Put your drawing right face down on the lightbox (if your drawing is in mirror image, you put it right side up) and put your fabric over it. Draw with a fine pencil the stems onto the fabric.
Neem nu een stukje stof wat royaal de steel kan bedekken.
Take a piece of fabric that can cover the stem.
Leg het stof voor de bloemsteel met de goede kant naar beneden op de lichtbak en leg je stof waarop de steel getekend is erover. Zet het vast met spelden.
Put the fabric for the stem right side down on the lightbox and put your other fabric over it. Pin it onto the fabric.
Maak nu over de getekende lijnen kleine rijgsteekjes.
Make over the drawing small basting stitches.
Als dat gedaan is dan draai je je lapje om en het ziet er dan zo uit.
When you have done that, turn over your fabric and it looks like this.
Pak een kalkpotlood en teken het lijntje over. Deze stap hoef je niet te doen, maar persoonlijk vind ik dit wel handig.
Take a chalk pencil and draw over the basting line. You can skip this step, but I find it easy so I can see the line later.
Knip nu het stof dicht bij de rijglijn af, laat een kleine naad zitten.
Cut the fabric away, so you have left a small seam allowance.
Haal nu een paar rijgsteekjes los en je kunt beginnen met appliceren.
Remove some of the basting stitches and begin to applique.
Sla met je naald het naadje naar binnen en zet dit vast. Doe dit tot je niet verder kunt en haal dan weer een aantal rijgsteekjes los en ga verder.
With your needle you put your seam allowance under and make a stitch, and so on and on till you can go any further. Then remove again some bastingstitches and continue.
Ga zo door tot je een kant van het steeltje helemaal vastgezet hebt.
Continue till you have sewed one side of the stem.
Begin met de andere zijde, haal enkele rijgsteekjes los en sla de naad zo veel mogelijk naar binnen, zodat er maar een heel smalle bloemsteel over blijft en appliceer het vast. Eigenlijk op dezelfde manier als de eerste zijde, alleen zorg je er nu voor dat je de naad zoveel mogelijk naar binnen werkt.
Start on the other side, remove some basting stitches and turn over your seam allowance as much as you can, so there is only a small stem left. You do the same thing as you did with the other side, only now you turn in as much seam as possible.
Als je ook de andere kant helemaal gedaan hebt, werk je je draadje af.
When you have stitched that side, you can end your thread with a knot and cut it.
Zo ziet het eruit als je beide zijden vast gezet hebt.
This is how it looks when you have done the two sides.
Aan de voorkant heb je nu een smal bloemsteeltje van 1/8 oftewel 3 mm. Deze methode noemen ze ook wel de back-basting methode.
On the front you have now a small stem of 1/8 inch. They call this method the back-basting method.


